3D Printing Principles and Rules
A 3D printer builds an object one thin layer at a time. A model can look correct on screen and still fail if it is floating, weak, badly oriented, or asking the printer to place material in mid-air.
Before you submit
Inspect your model from the top, side, and underneath. Check that it is flat on the workplane, that every solid piece overlaps another solid piece, and that each new layer will have something beneath it.
1. Put a broad, flat face on the workplane
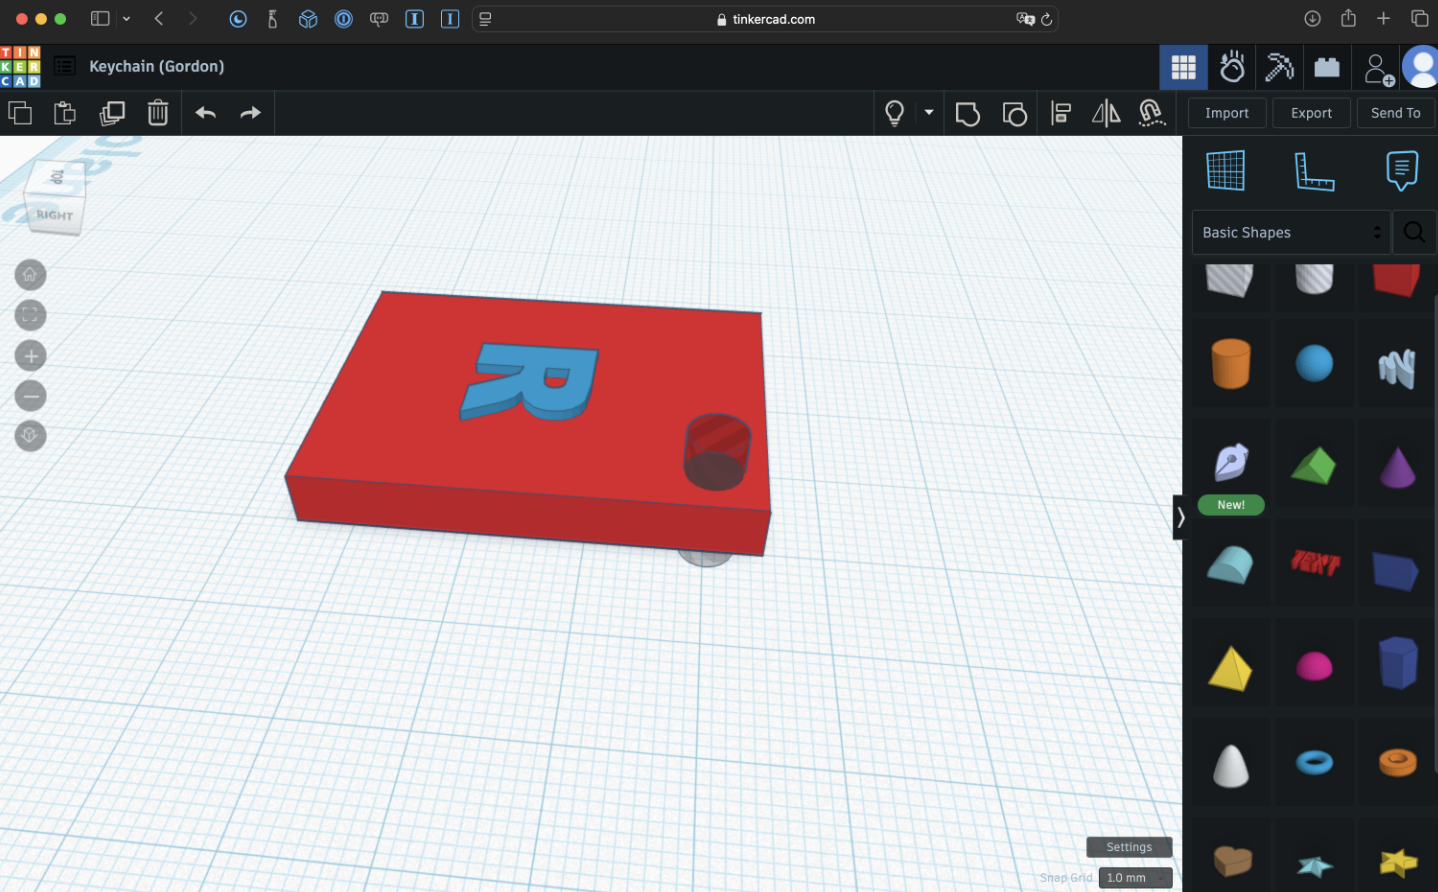
The blue workplane in Tinkercad represents the printer’s build plate. A broad, flat bottom gives the first layer more contact and makes the print more reliable.
This orientation has a stable base:
This orientation has very little contact with the build plate and is likely to come loose:
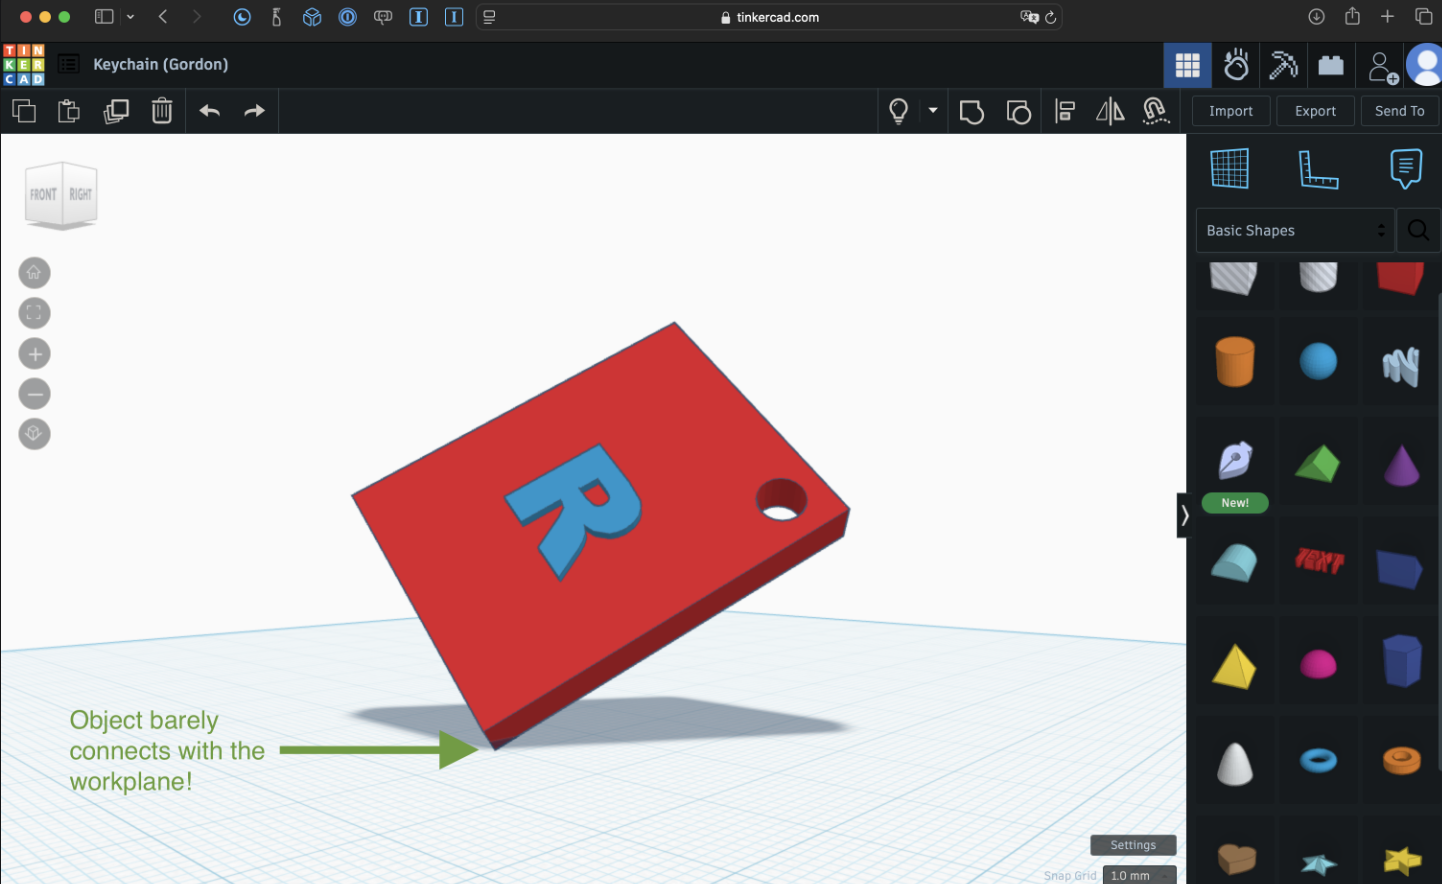
Use Drop to Workplane or press D, then inspect the model from the side. A tiny gap can be difficult to notice from above.
2. Make sure nothing is floating
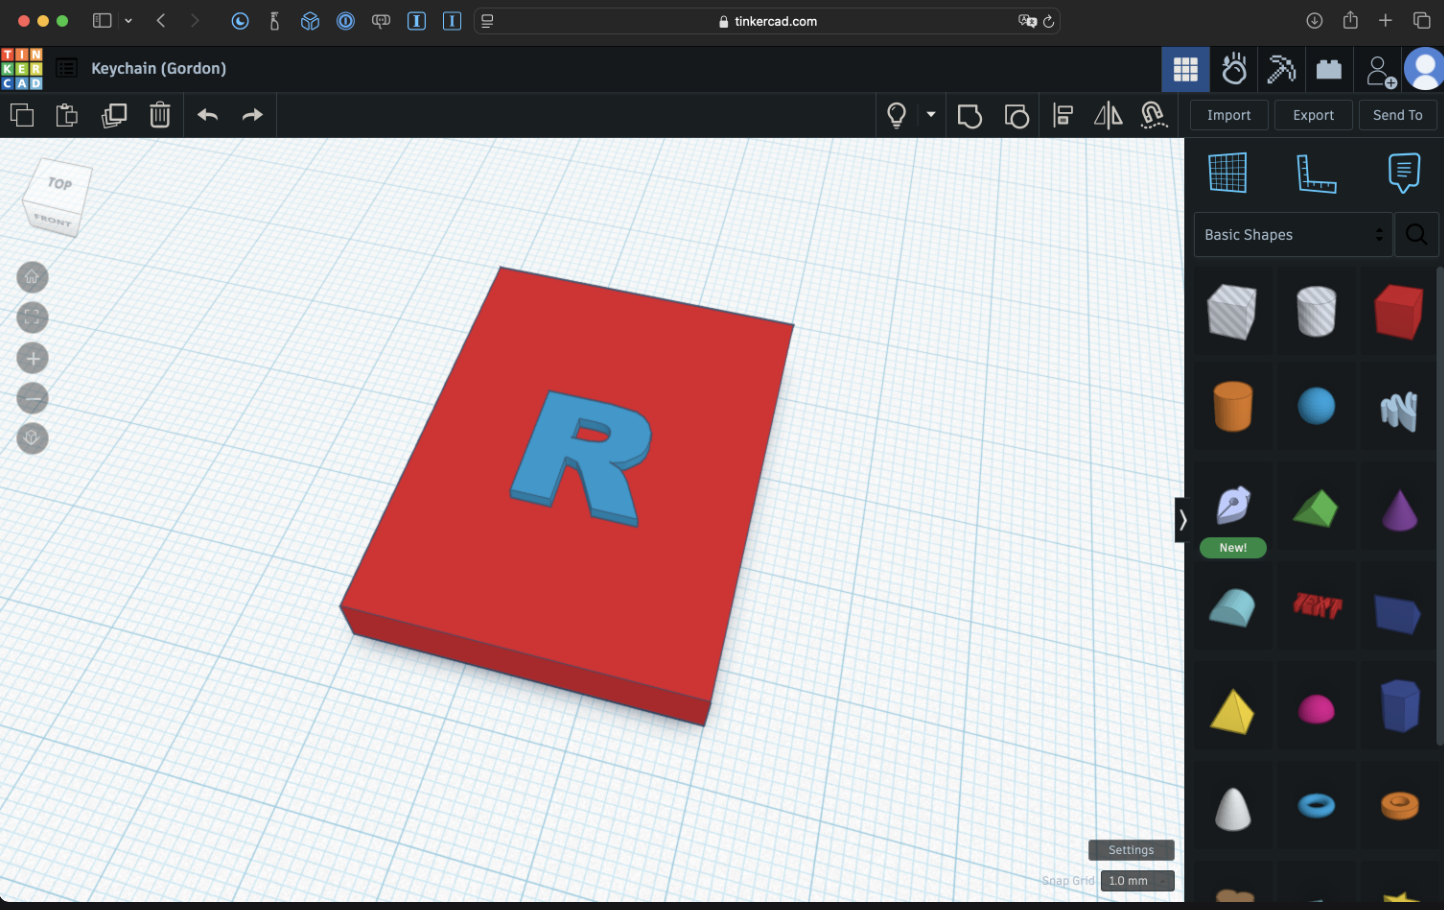
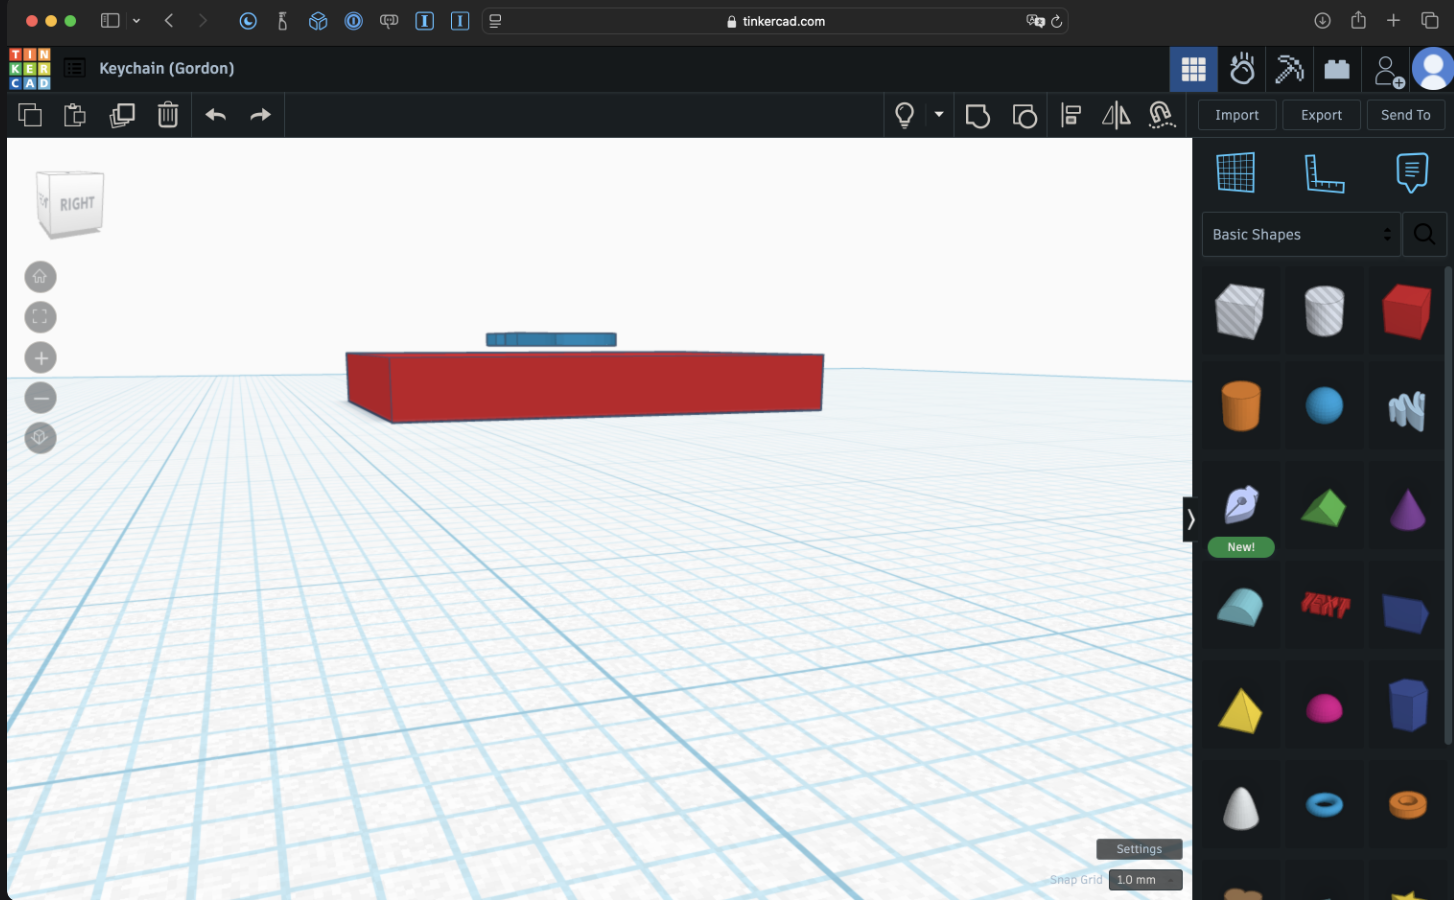
Every part must touch and overlap the main model. Shapes that merely appear to touch from the top may still be separated vertically.
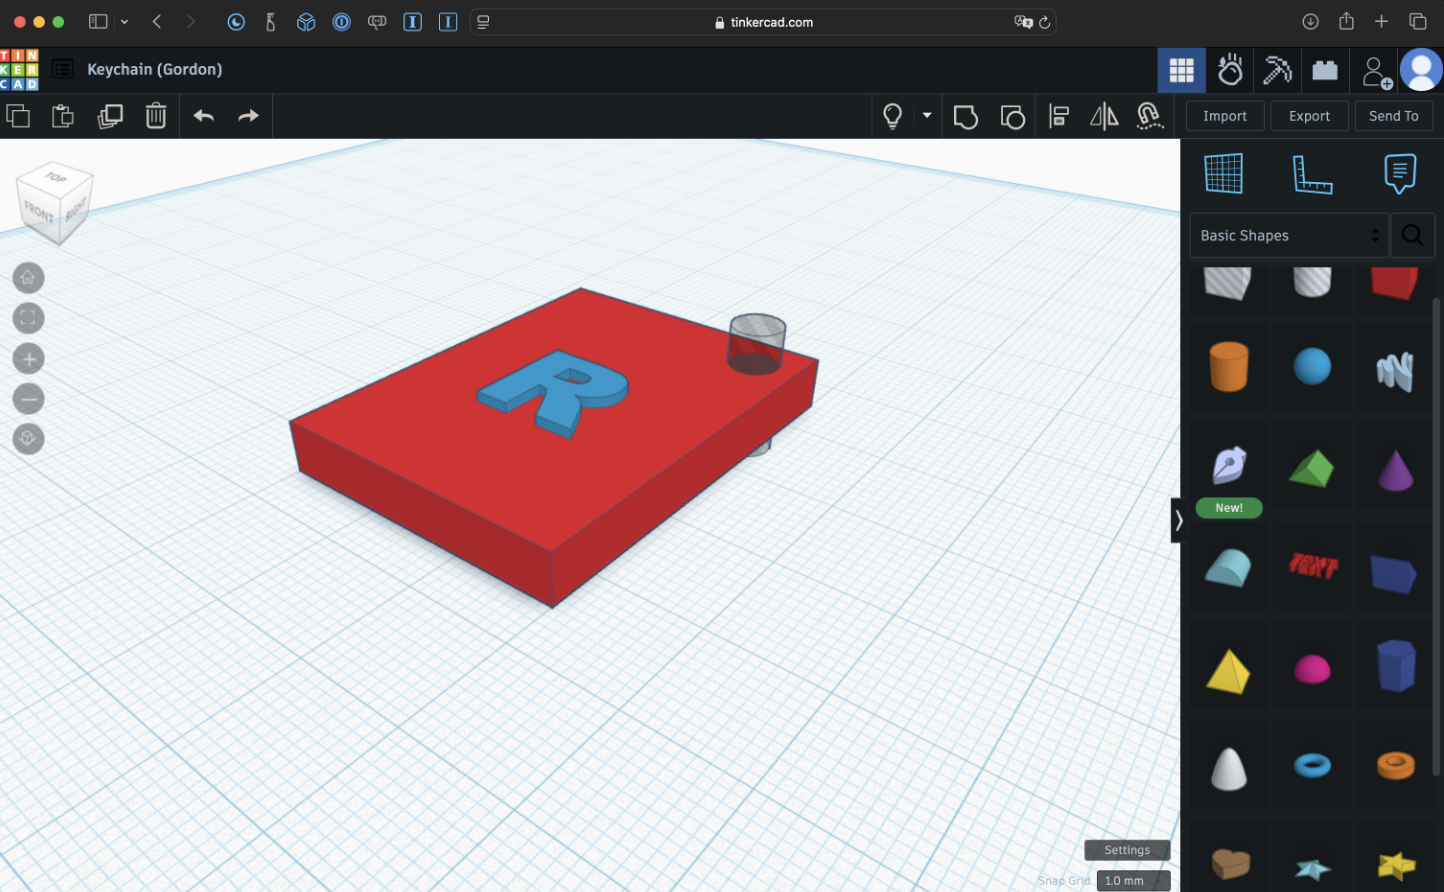
From above, this letter appears connected:
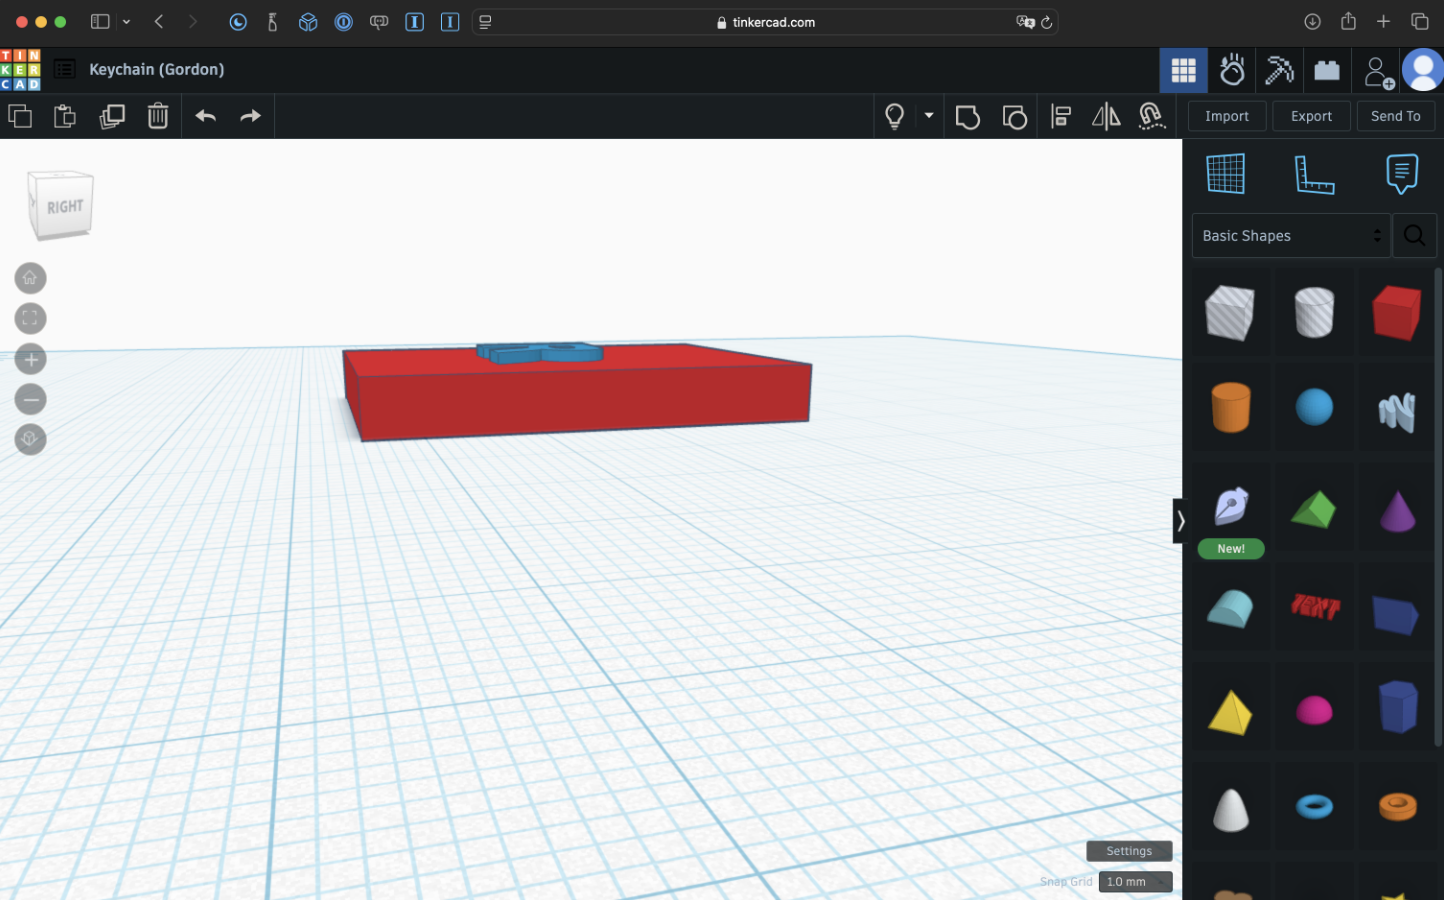
Rotating the model reveals the gap:
Lower the shape until it overlaps the base, then group the pieces:
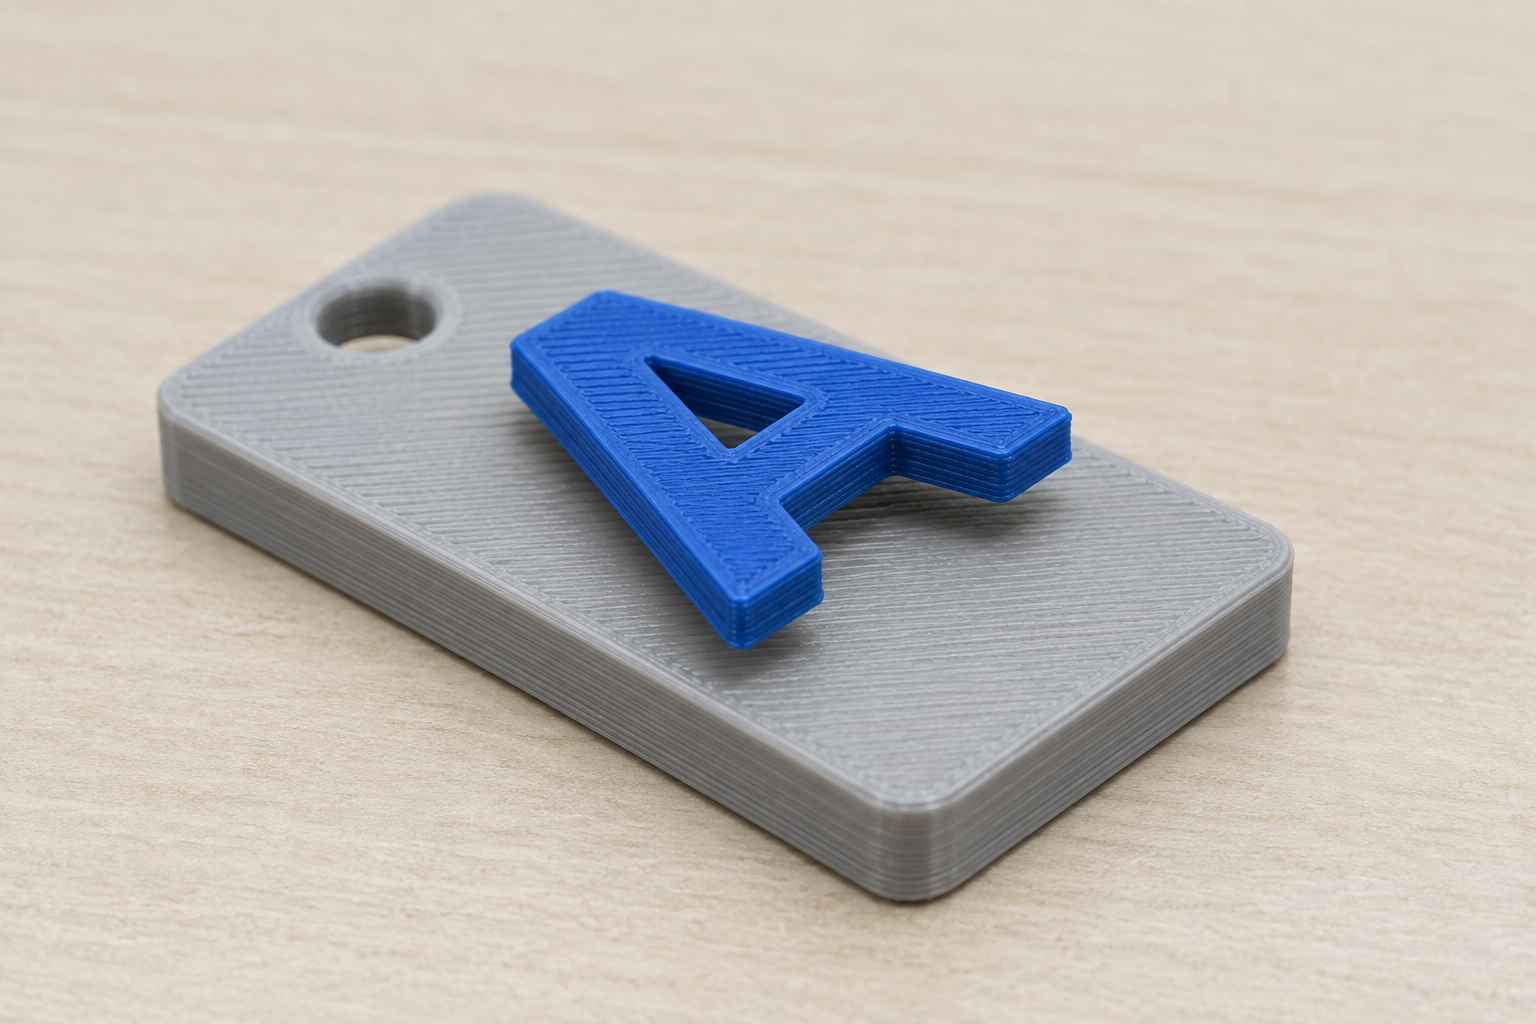
This printed example shows what happens when a raised detail is not properly joined to its base:
3. Connect pieces with real overlap
Two shapes touching edge-to-edge can separate or slice as two different parts. Push one solid slightly into the other before grouping. Check the connection from more than one angle.
Parts attached by a very narrow neck are also easy to break:
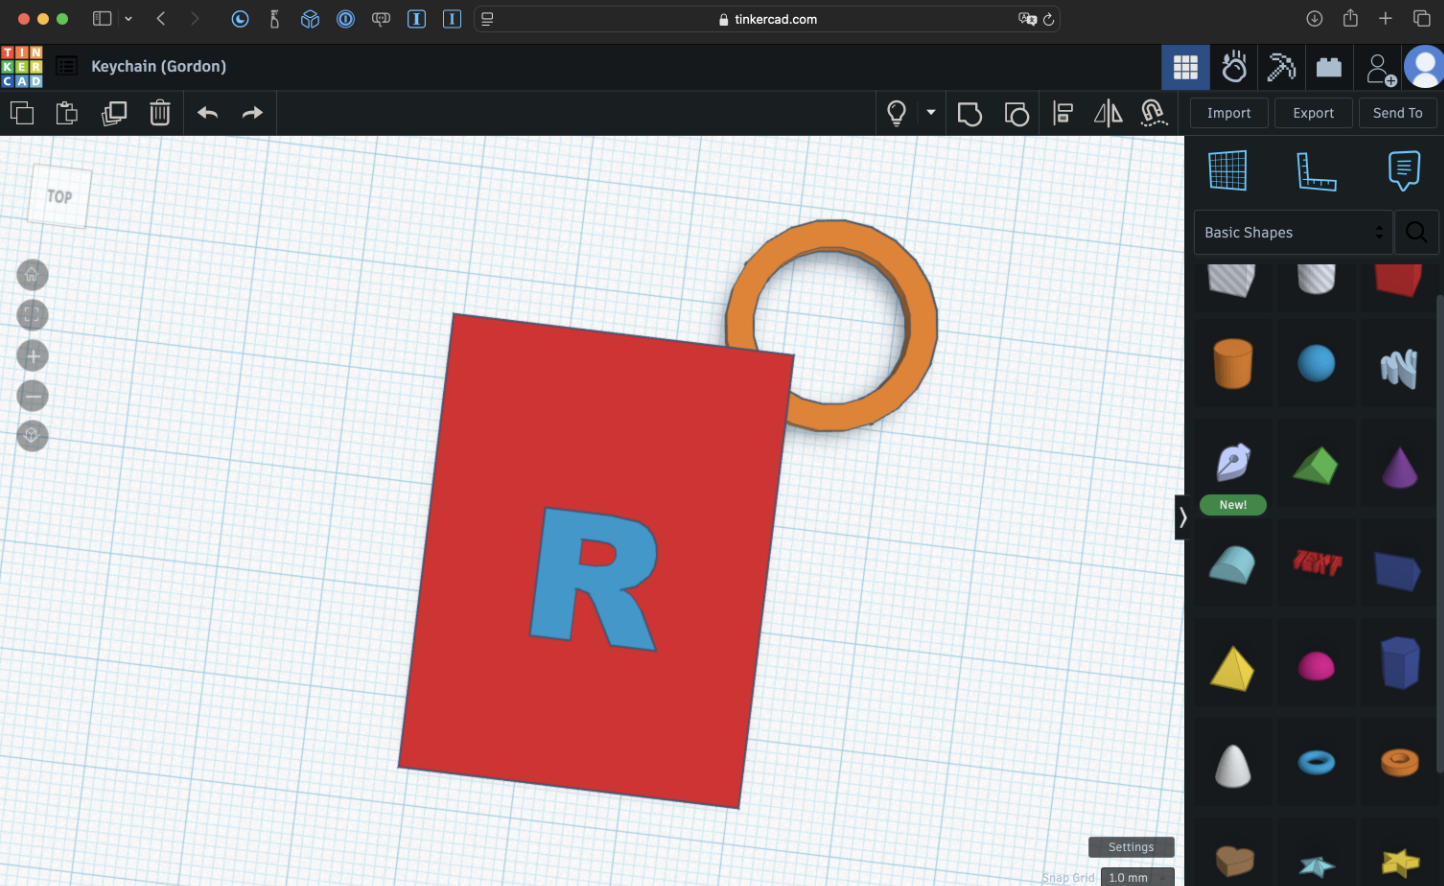
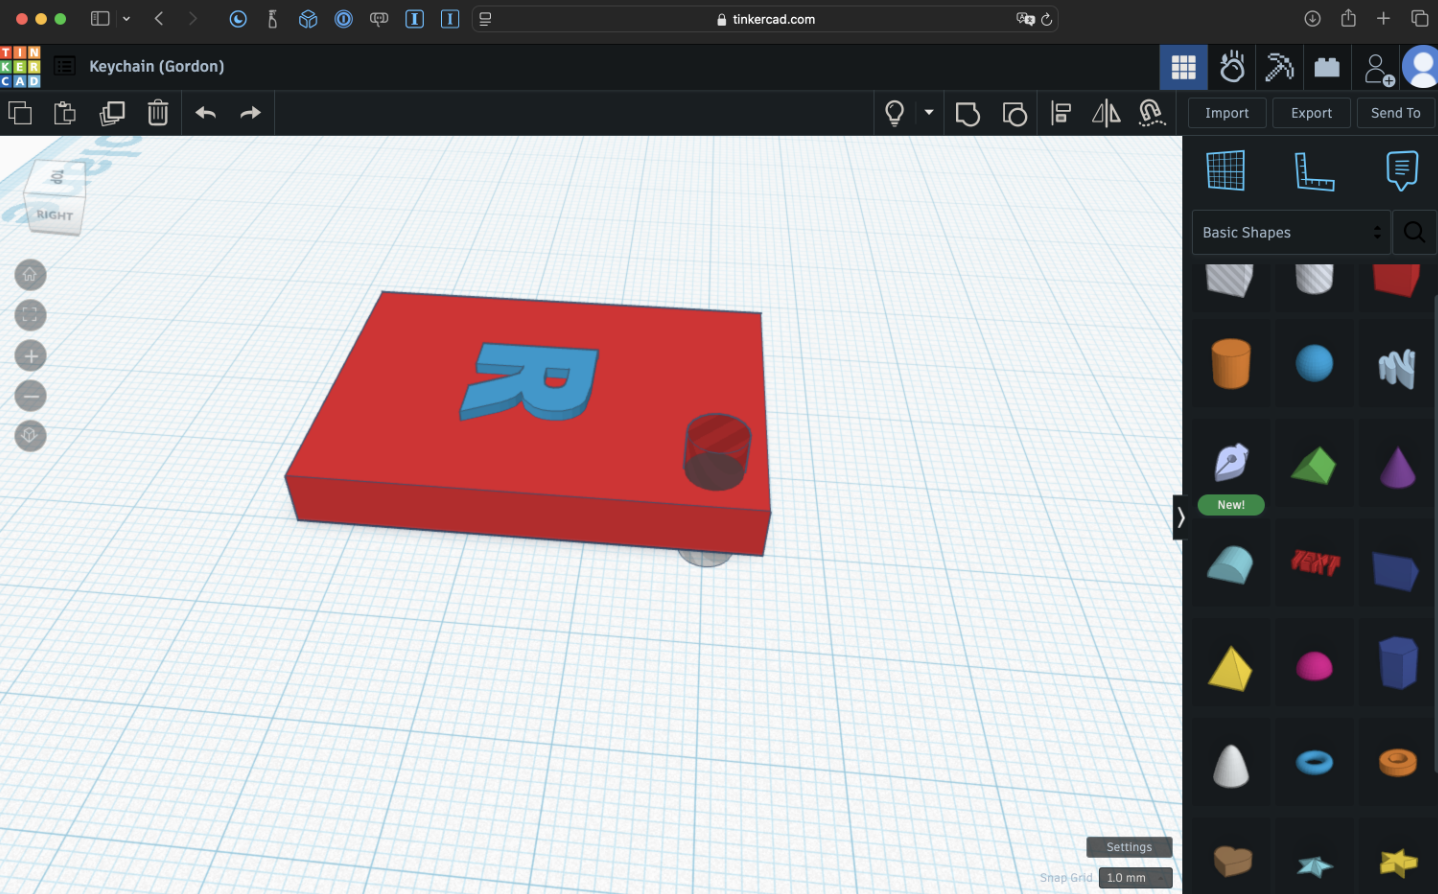
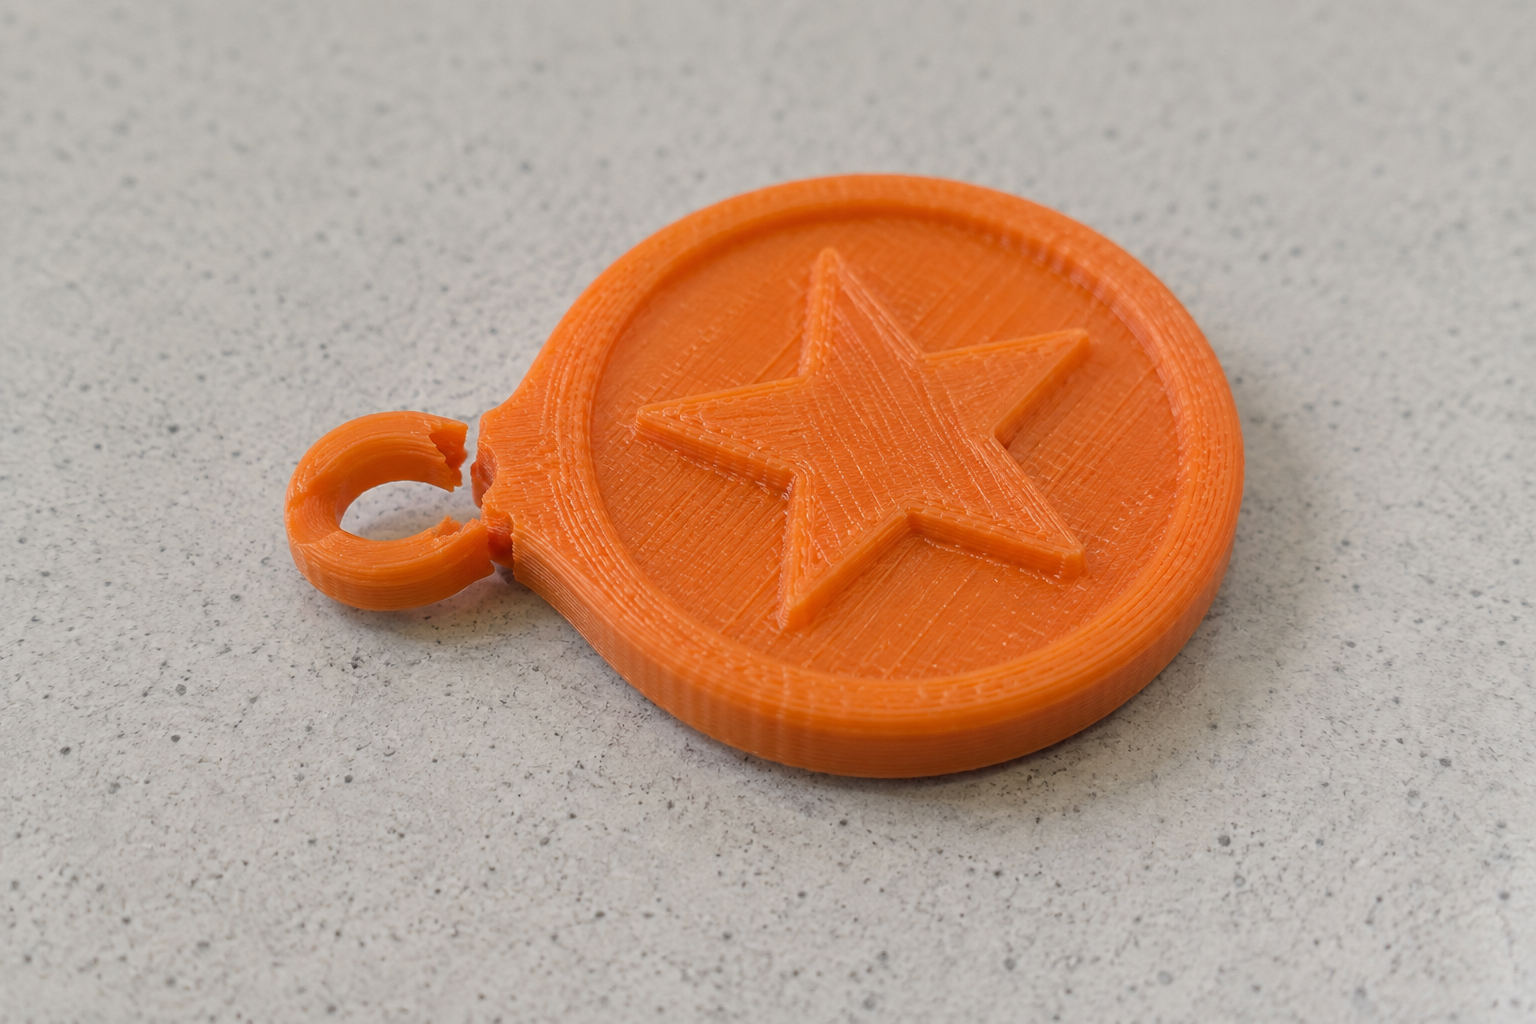
For a keychain, a hole inside a thicker body is usually stronger than a thin loop attached to the outside:
4. Reduce unsupported overhangs
An overhang extends outward without enough printed material beneath it. The printer cannot place a long horizontal layer into empty air, so the filament may droop or turn into loose strands.
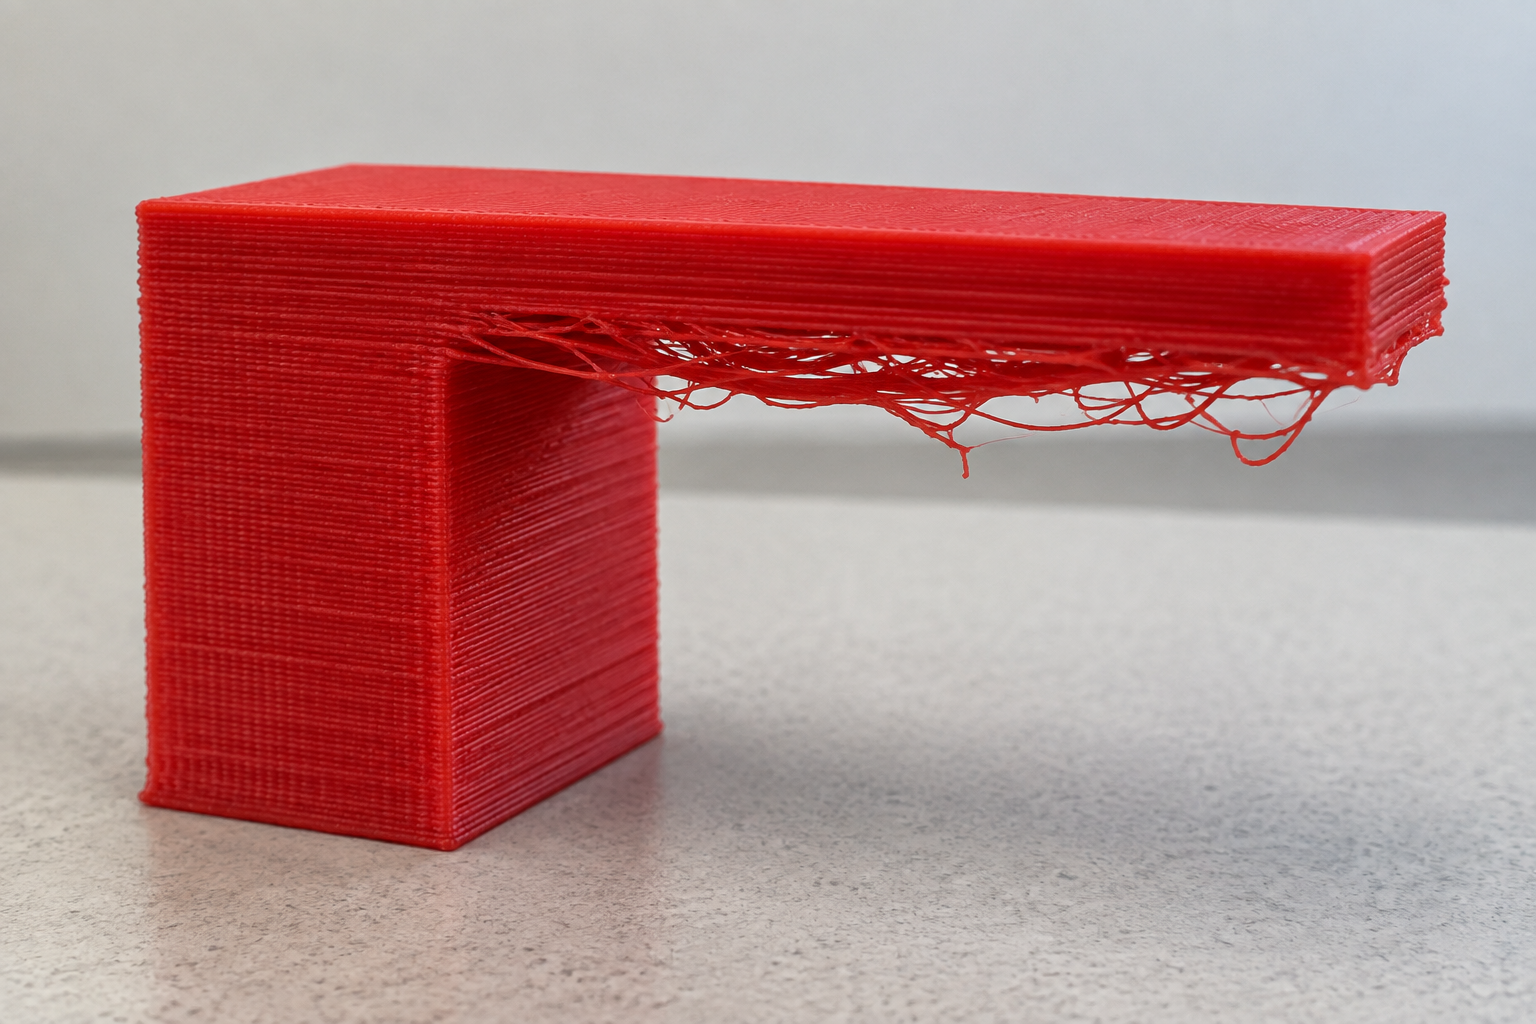
Try these solutions before relying on generated supports:
- rotate the model so a larger face rests on the workplane;
- replace a flat underside with a slope, chamfer, or arch;
- shorten the overhang;
- add a support that is part of the design.
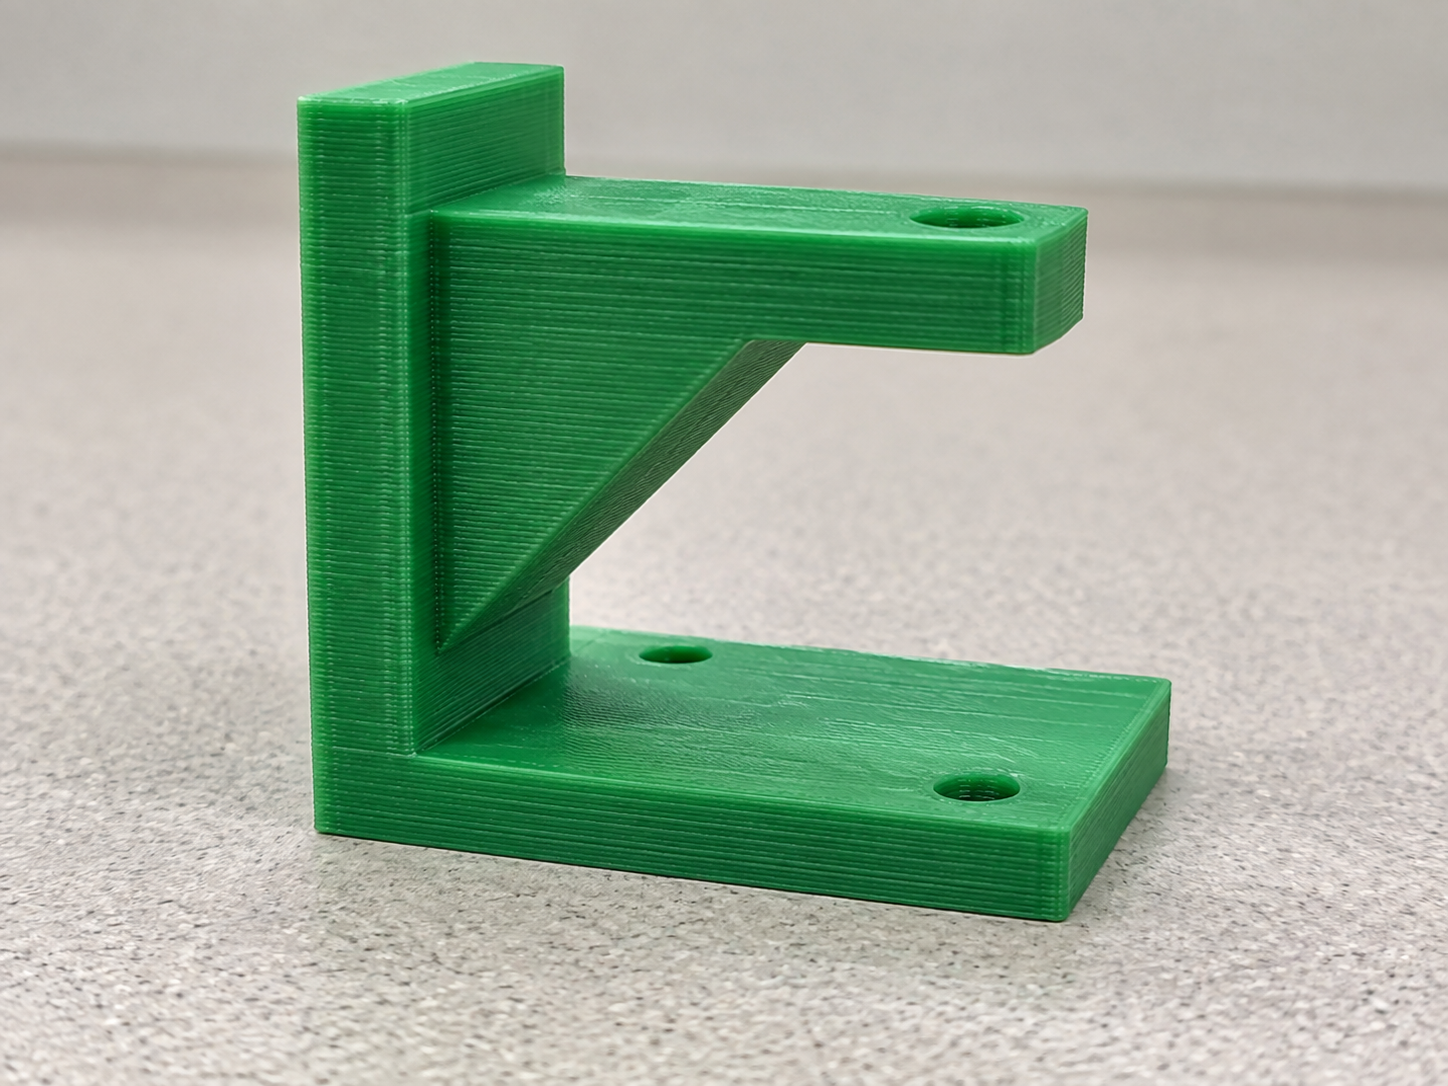
This triangular brace makes the design self-supporting and also strengthens the corner:
5. Treat bridges carefully
A bridge is a horizontal span printed between two supported sides. A short bridge may succeed because both ends are supported. A long bridge is more likely to sag.
If a bridge is too long, reduce the span, divide it into shorter spans, turn the opening into an arch, add a designed support, or change the print orientation.
6. Use supports only when the design requires them
Supports are temporary printed structures that hold up overhangs. They add print time and material, can leave rough surfaces, and become plastic waste after removal.
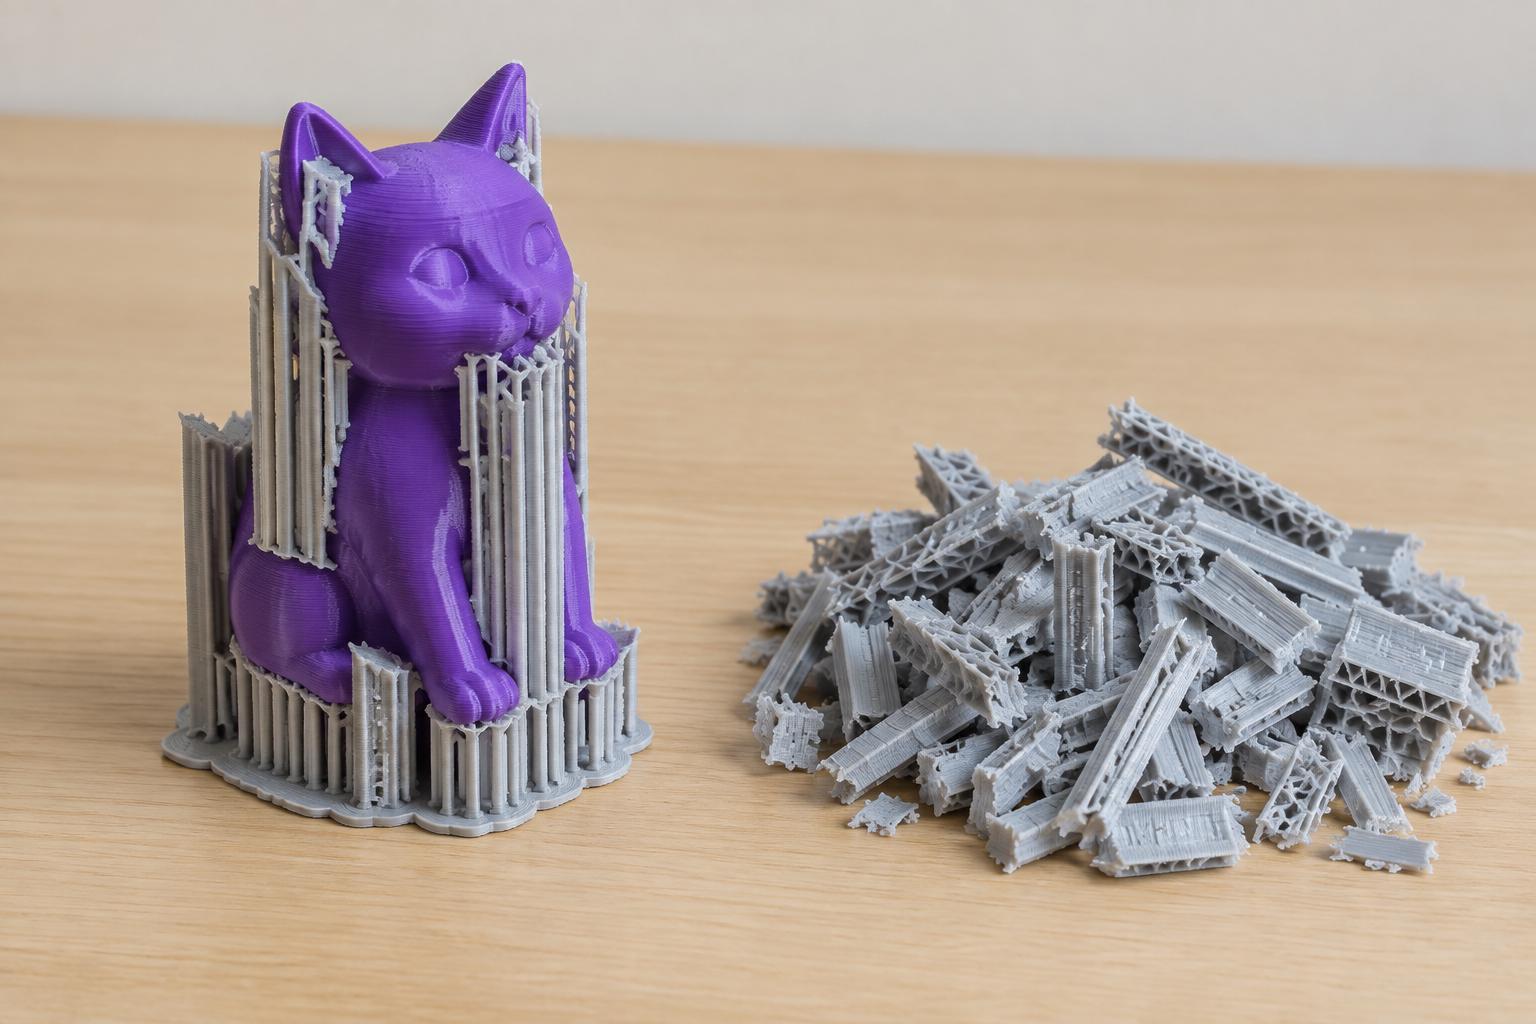
Ask: Could I rotate or redesign this model so it needs fewer supports?
7. Avoid details that are too thin or fragile
Extremely thin walls, tiny text, narrow pins, shallow details, and long delicate parts may not print clearly or may break during use. Consider the direction of force: where would the object bend or snap if it were pulled, dropped, or used as intended?
Whenever possible:
- thicken small text and raised details;
- widen narrow connections;
- add a fillet, brace, or larger contact area;
- print a small test piece before committing to a long print.
8. Leave clearance between fitting parts
A digital peg and hole with identical measurements may not fit after printing. Printed holes often end up slightly smaller, while pegs can end up slightly larger. Parts intended to move or fit together need a small amount of clearance.
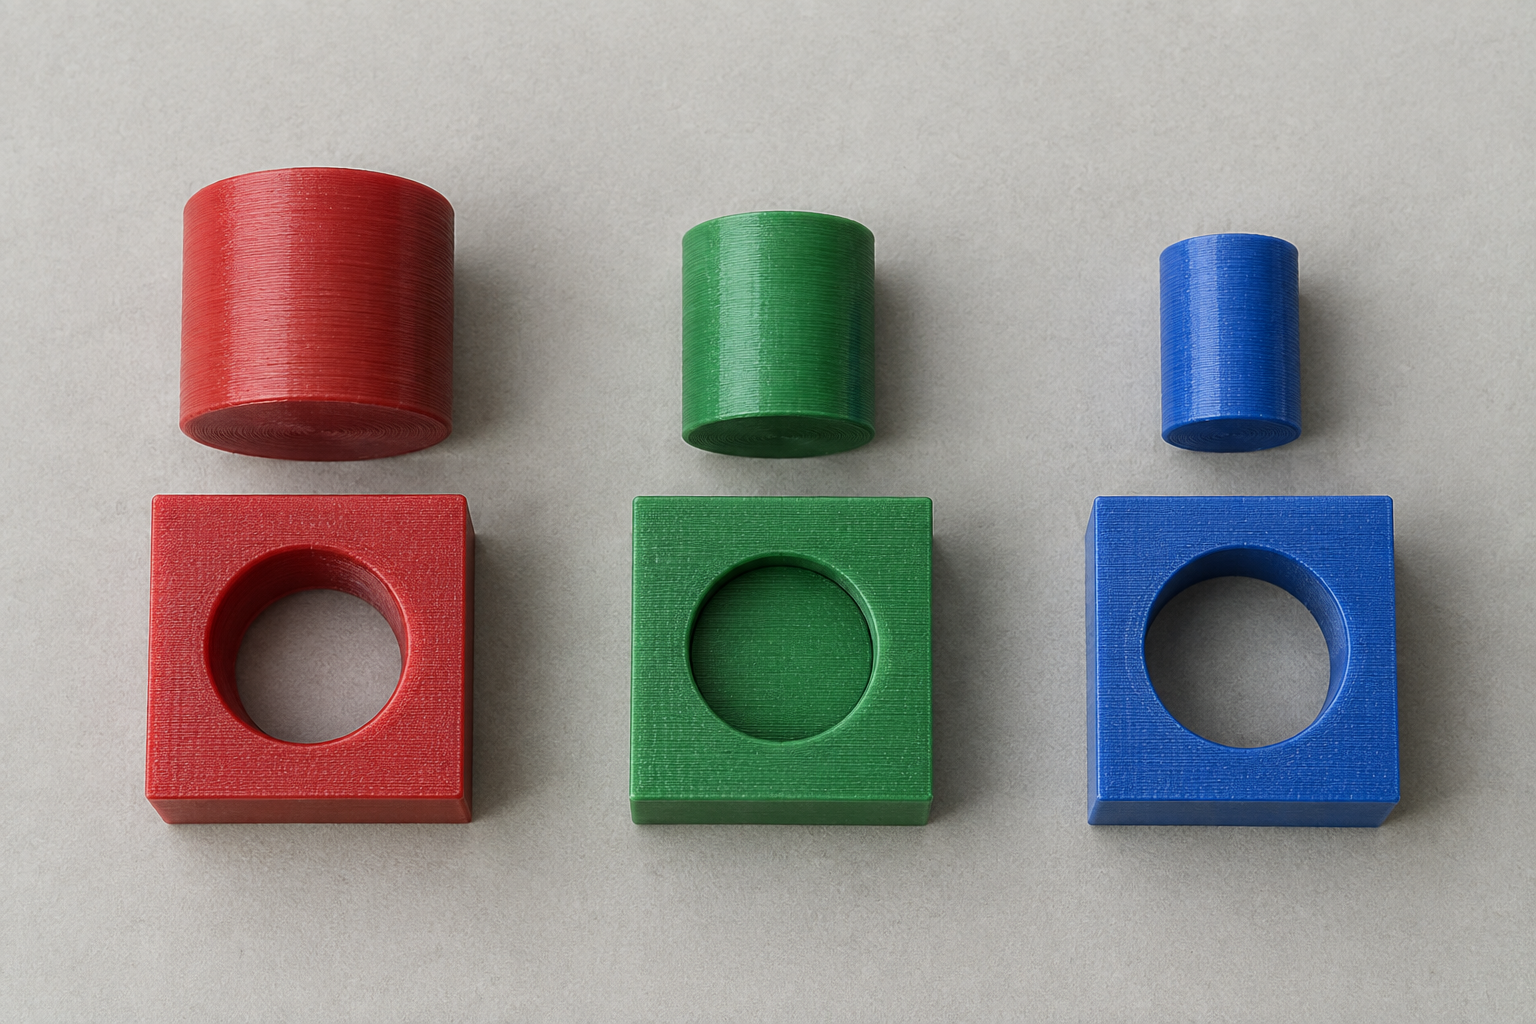
Test important fits with a small sample. Do not assume that two equal digital measurements will create a usable physical fit.
9. Check scale and units
Tinkercad normally uses millimetres. Measure a comparable real object with a ruler or caliper. A model can be perfectly shaped and still be impractically small, large, thin, or expensive to print.
10. Balance strength, time, and material
Larger objects, thicker walls, more infill, rafts, and supports can increase strength or reliability, but they also use more filament and printer time. Use only what the object needs.
Final model check
Before submitting, answer yes to each question:
- Is a broad, flat face sitting directly on the workplane?
- Does every solid piece overlap and connect to the main object?
- Did I inspect the top, sides, and underside?
- Have I reduced long bridges and unsupported overhangs?
- Are loops, walls, text, and connectors thick enough to survive normal use?
- Are the dimensions sensible in millimetres?
- If parts must fit together, have I allowed clearance?
- Can I reduce supports, material, or print time without weakening the design?
9. Work safely and fairly
- Students do not operate the printer unless explicitly trained and authorized.
- Treat the hot end and heated bed as burn hazards.
- Keep hands away from moving equipment.
- Do not touch, remove, or interrupt another person’s print.
- Submit original, appropriate work.
- The printer is shared; keep requests reasonably sized.
- Filament colour is normally whatever is already loaded. Special colour requests require explicit permission.
- Failed prints and support material have financial and environmental costs.
Curriculum connections
A1.5: Establish and justify evaluation criteria.
A2.3: Select resources with attention to their properties and sustainability.
A3.2: Identify performance standards and quality-control methods.
A4.2: Identify hazards and minimize risk.
A4.6: Demonstrate a safety mindset.
B2.2: Assess environmental and economic impacts of technology.