3D Printing Principles and Rules
A 3D printer builds an object one thin layer at a time. A model that looks good on screen can still fail if each new layer is not supported by the material below it.
1. Begin with a stable base
Place a broad, flat face on the workplane whenever possible. More contact with the build plate usually means better adhesion and a more reliable print.
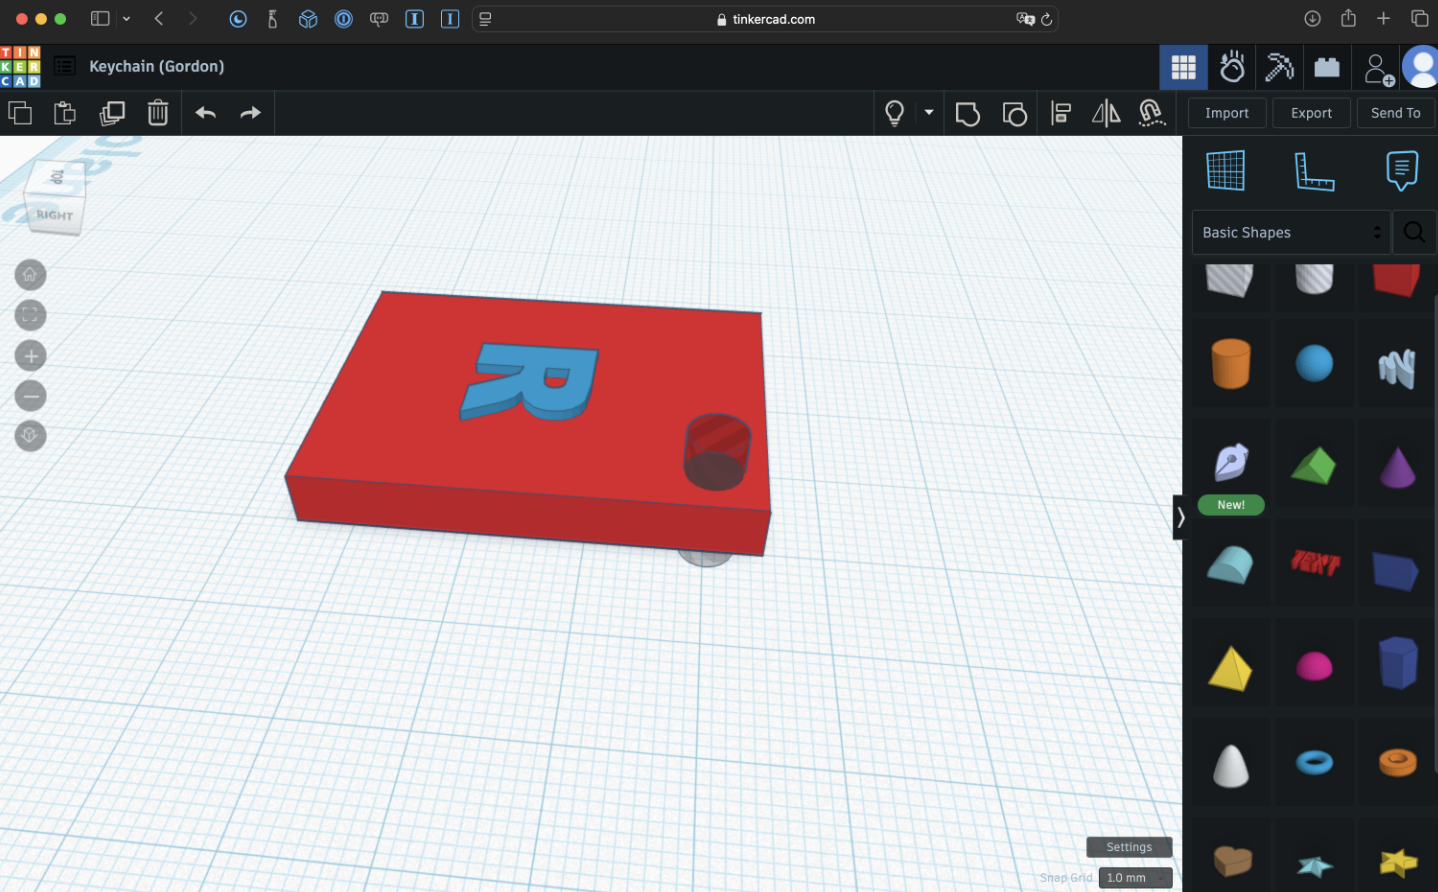
This orientation has very little contact and is likely to fail:
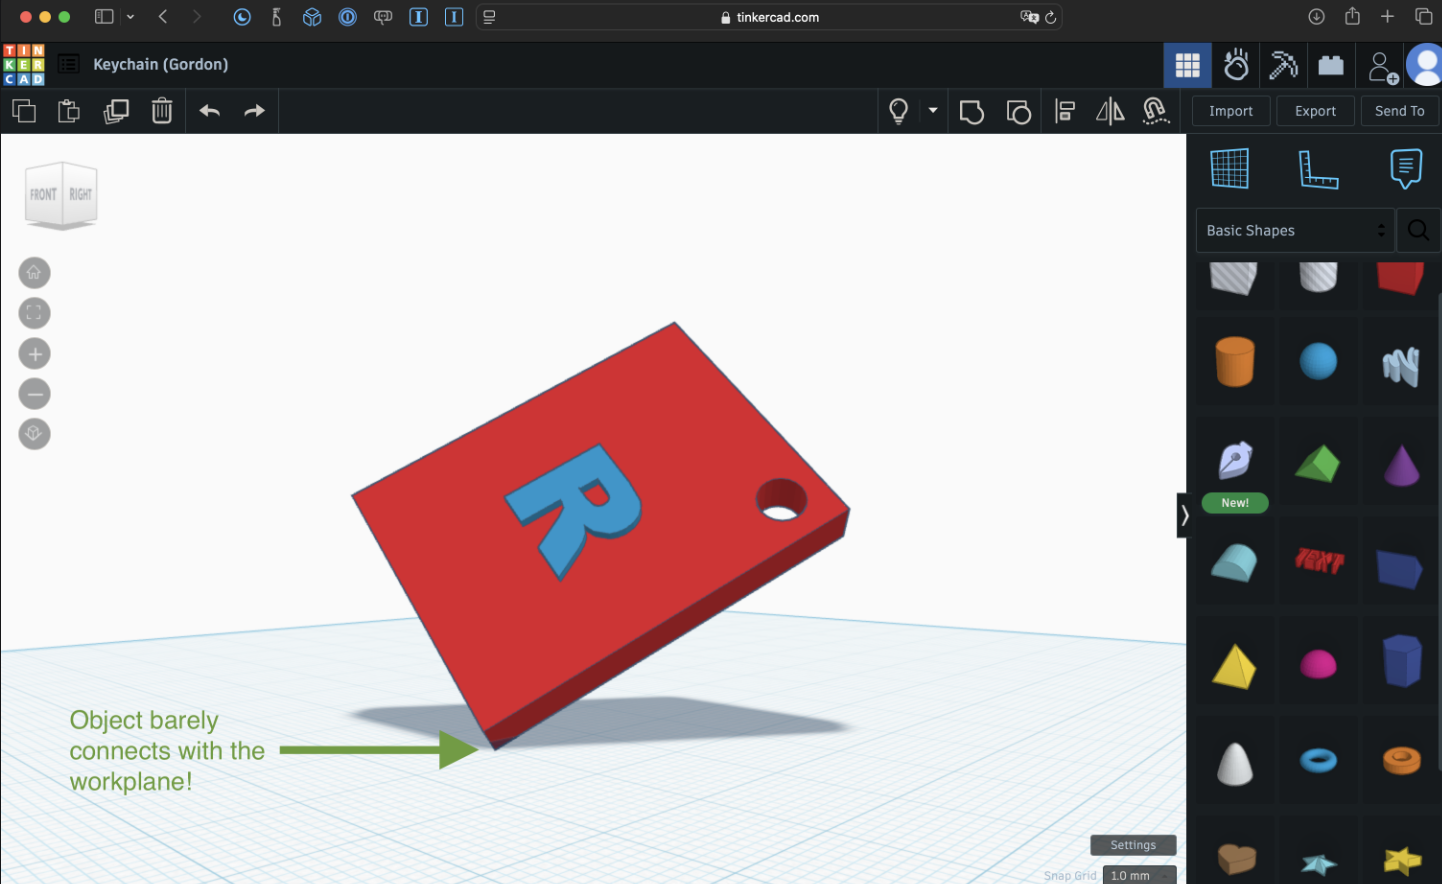
2. Minimize overhangs and supports
An overhang extends outward without enough material beneath it. Gentle slopes, chamfers, arches, and self-supporting angles usually print more reliably than flat horizontal ceilings or parts that jut into the air.
- Reorient the object before adding supports.
- Replace a sharp horizontal overhang with a slope or arch when possible.
- Keep overhangs short.
- Use supports only when the design truly requires them; they increase time, material, cleanup, and waste.
3. Understand bridges
A bridge is a short horizontal span printed between two supported sides. Short bridges may succeed; long bridges may sag. Reduce the span, add a designed support, change the orientation, or redesign the opening as an arch.
4. Avoid floaters and weak connections
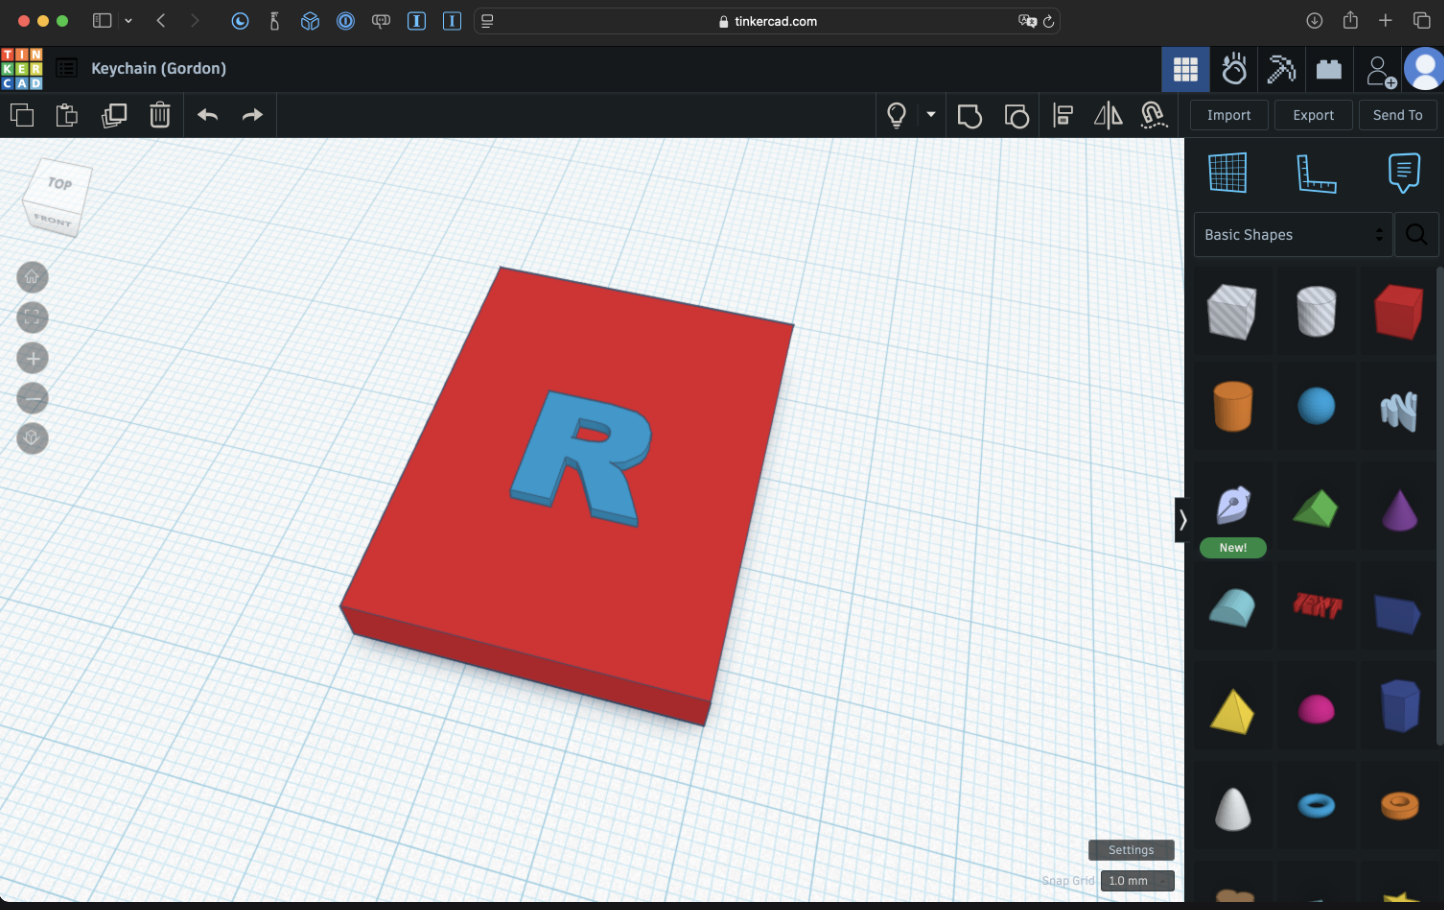
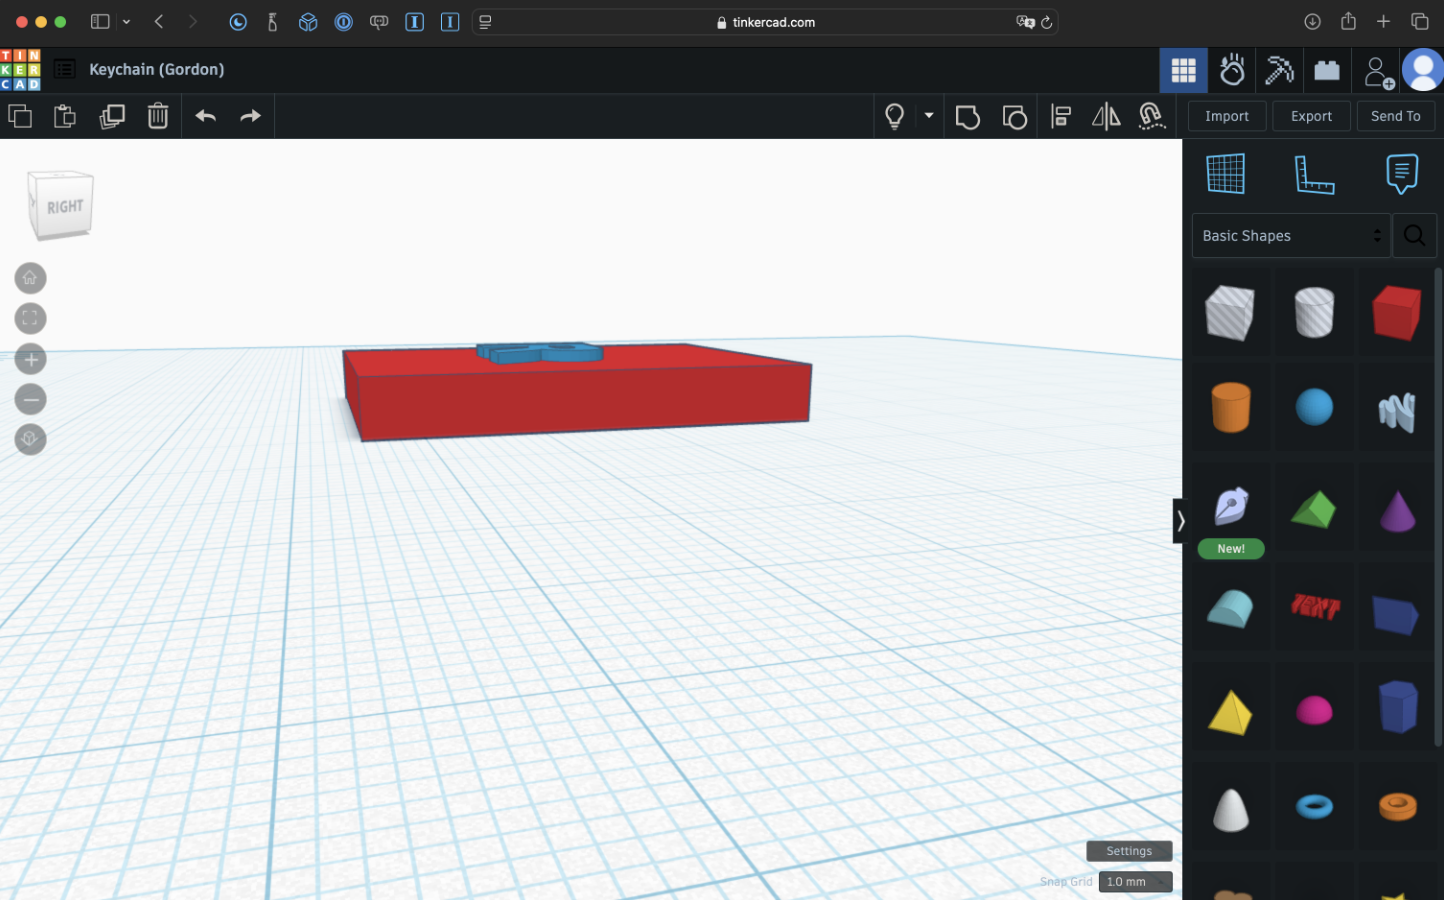
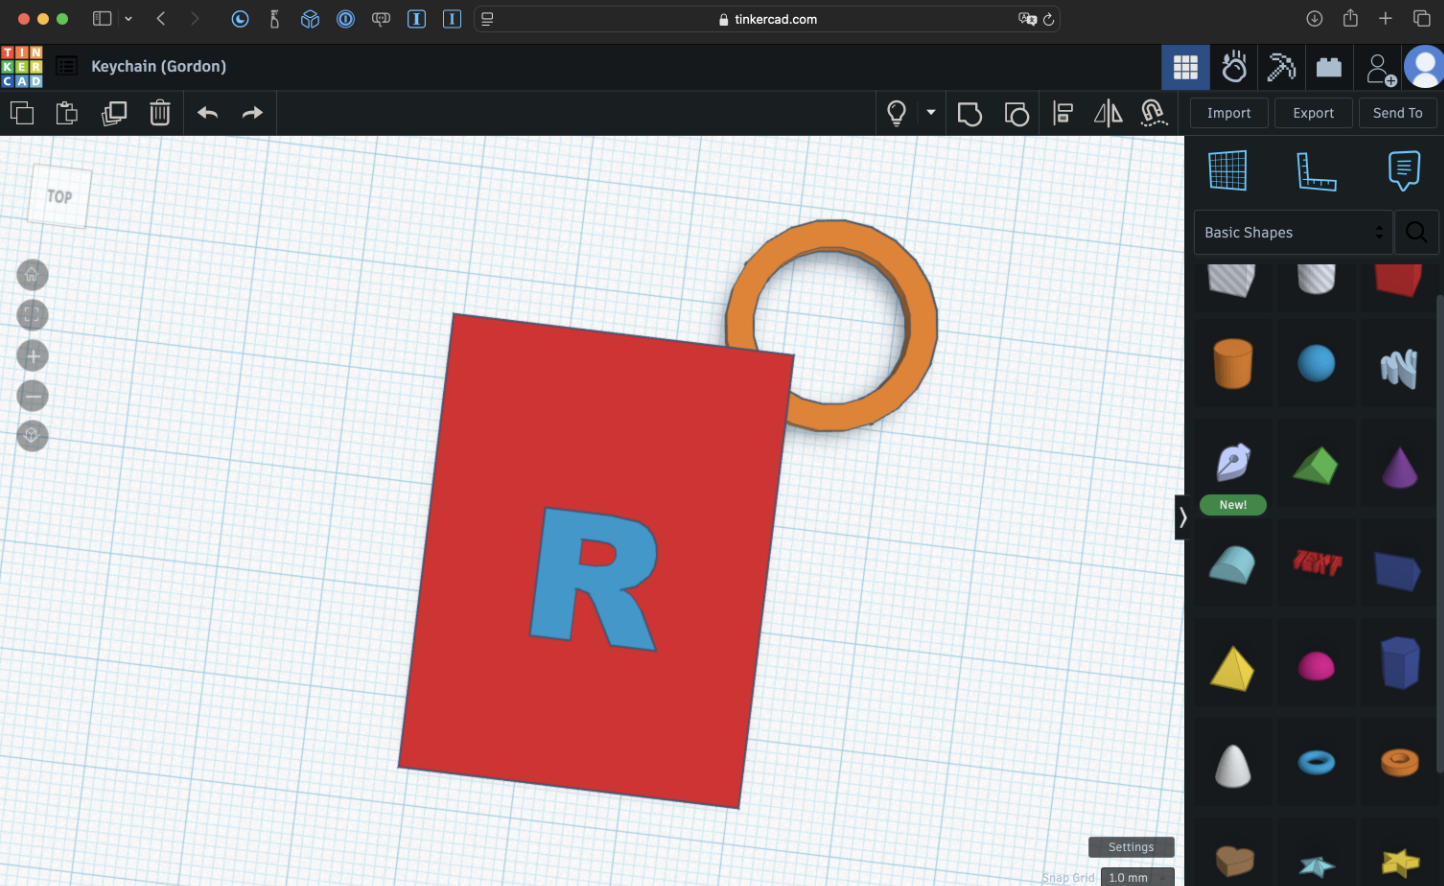
Every part must connect securely. From above, this letter appears connected:
Rotating the model reveals that it floats:
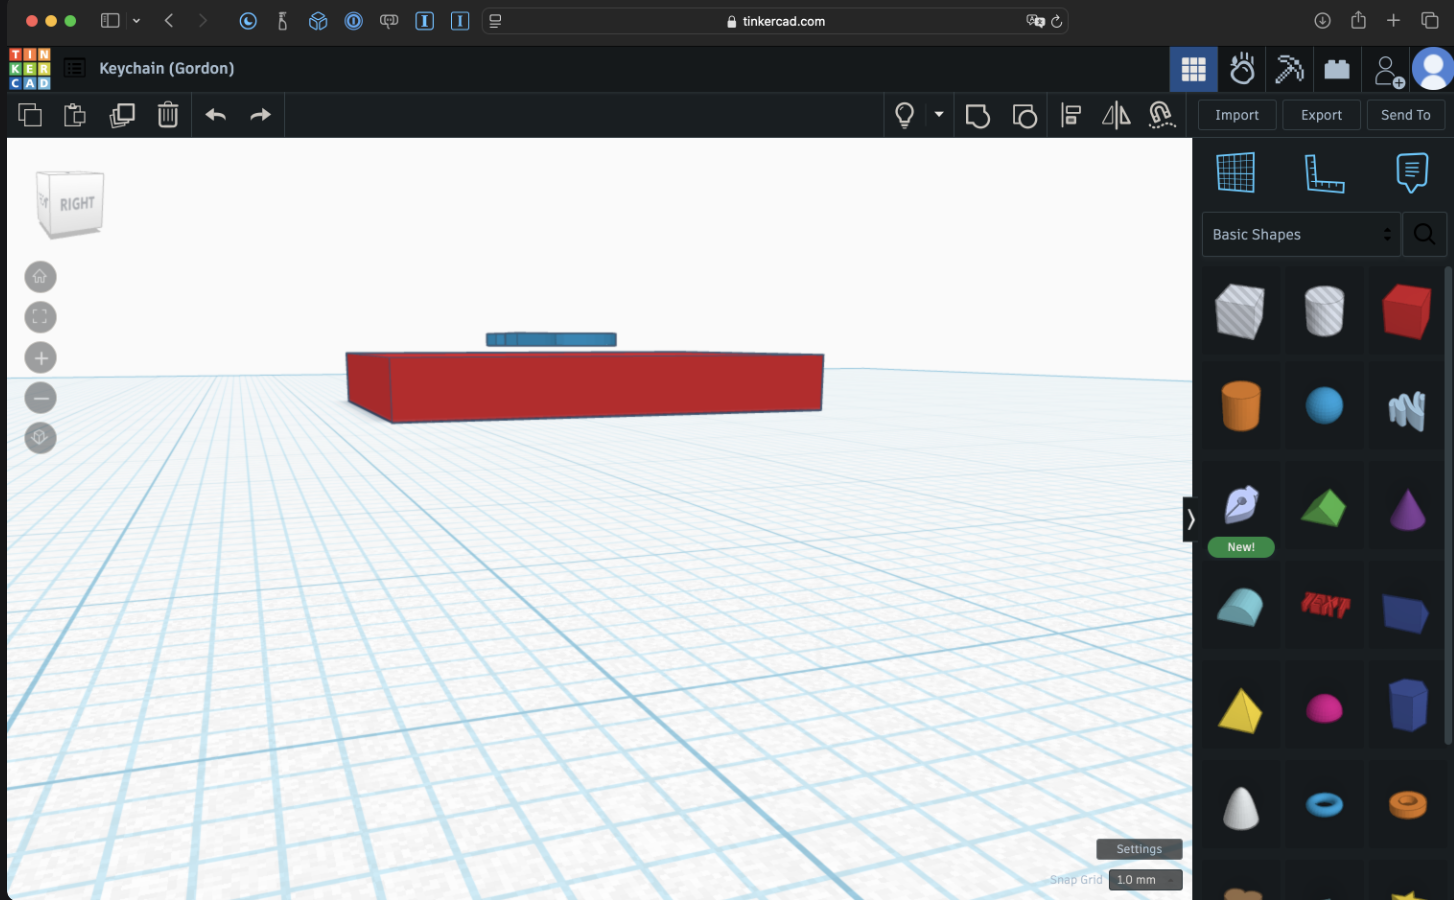
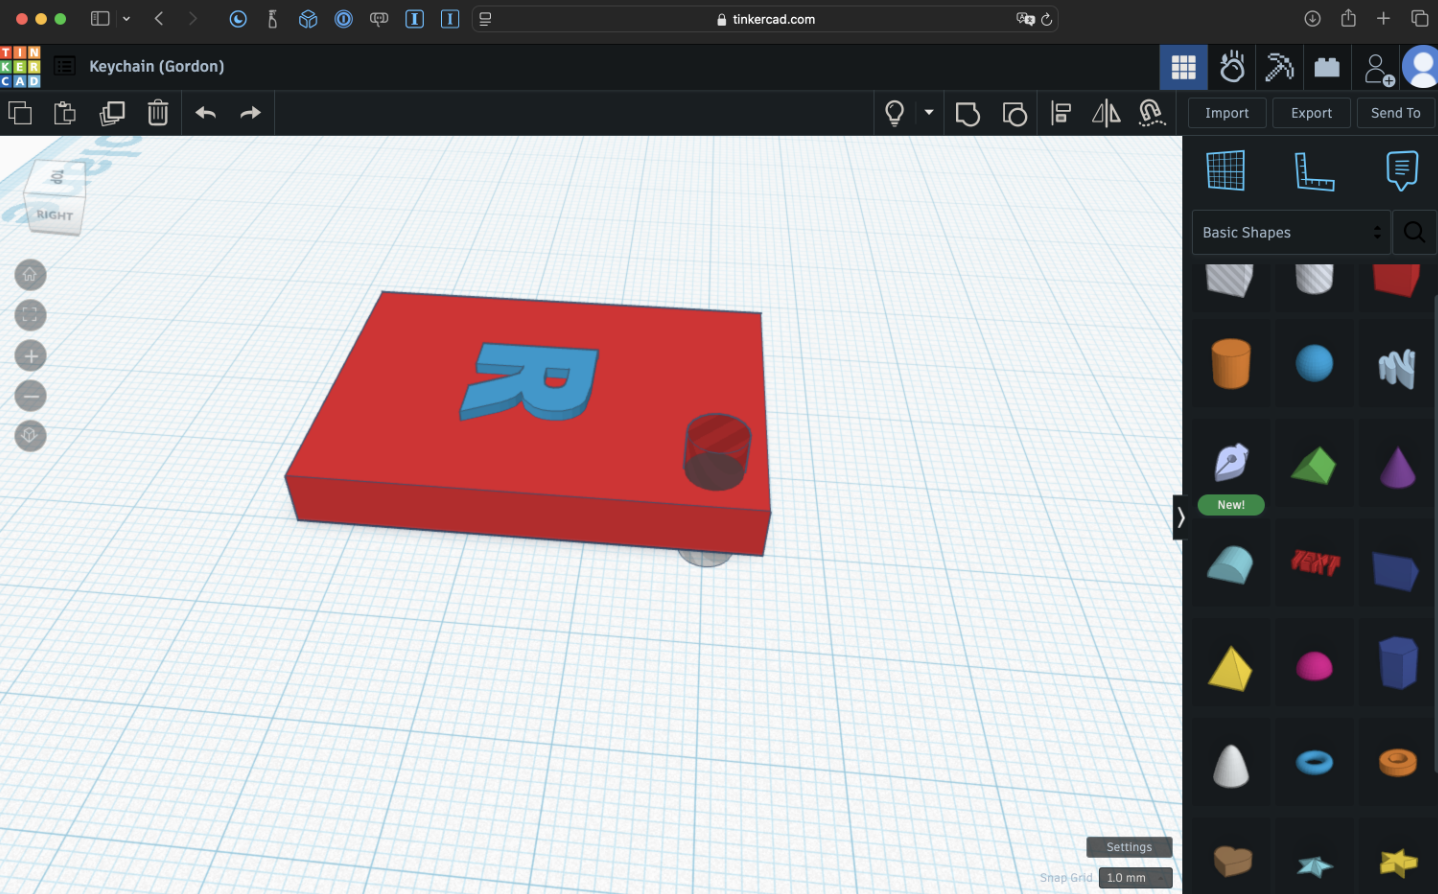
Sink or join the part into the base:
Parts that hang from a narrow connection are also fragile:
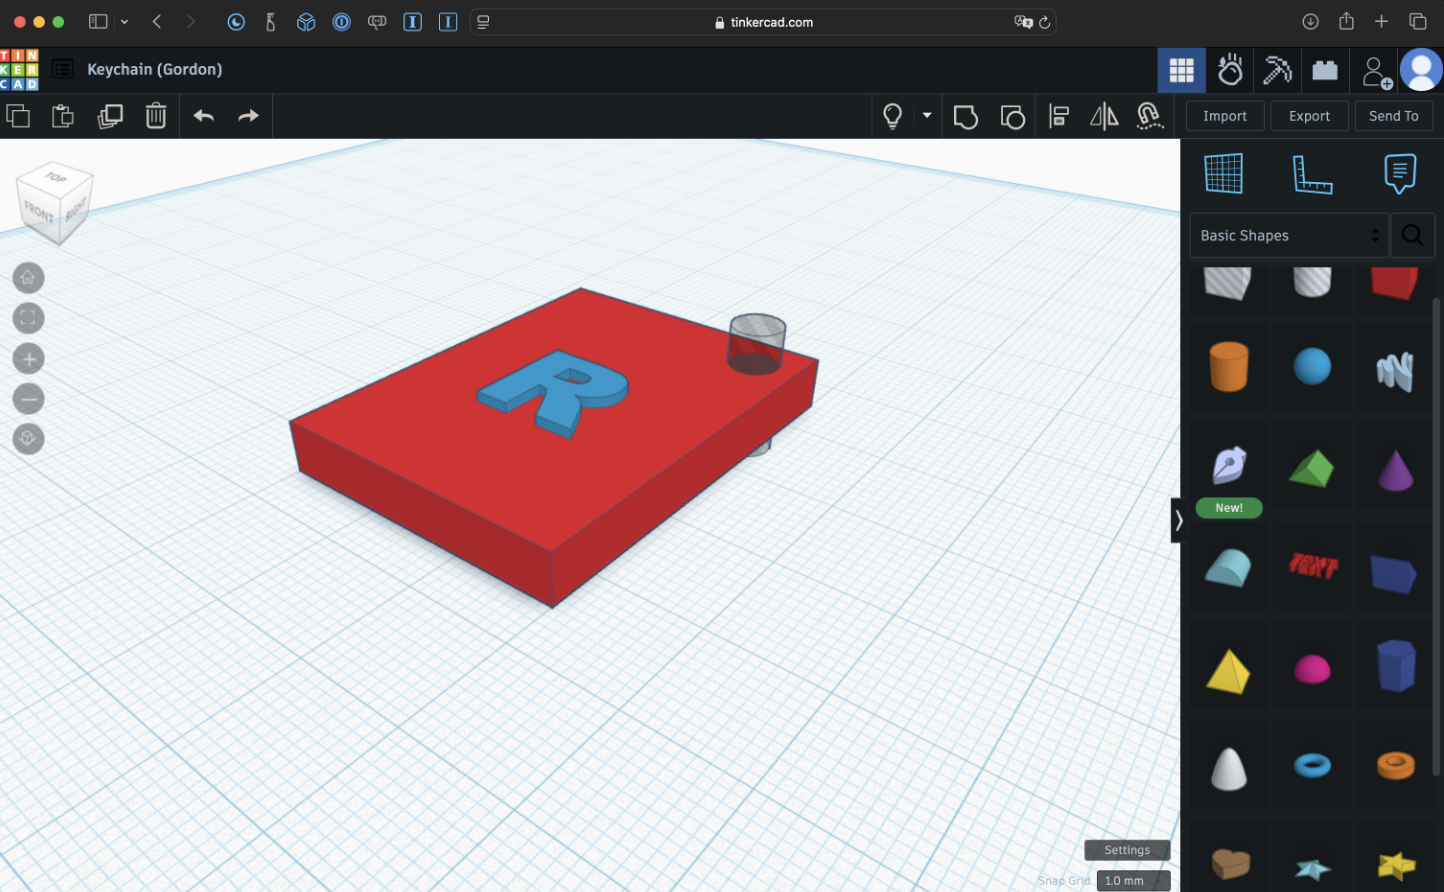
A hole within a stronger body is often a better solution:
5. Use practical thicknesses and details
Extremely thin walls, tiny text, narrow pins, and shallow surface details may not print clearly or may break. Compare every feature with the printer’s nozzle size and the forces the object will experience.
6. Plan holes, clearances, and moving fits
Printed holes can be slightly smaller than the digital model, while pegs can print slightly larger. Parts intended to fit together need clearance rather than identical measurements. Test a small sample when an exact fit matters.
7. Check scale and units
Tinkercad normally uses millimetres. Measure a comparable real object with a ruler or caliper. A model can be perfectly shaped and still fail because it is impractically small or large.
8. Balance strength, time, and material
More size, infill, walls, rafts, and supports can improve some prints, but they also use more filament and printer time. Use only what the object needs.
9. Work safely and fairly
- Students do not operate the printer unless explicitly trained and authorized.
- Treat the hot end and heated bed as burn hazards.
- Keep hands away from moving equipment.
- Do not touch, remove, or interrupt another person’s print.
- Submit original, appropriate work.
- The printer is shared; keep requests reasonably sized.
- Filament colour is normally whatever is already loaded. Special colour requests require explicit permission.
- Failed prints and support material have financial and environmental costs.
Printability station activity
Working with a partner, inspect the provided successful and failed prints or reference models. For each one:
- Identify the likely print orientation.
- Find one strength and one risk.
- Measure one important feature.
- Recommend one change that would improve reliability or reduce waste.
Curriculum connections
A1.5: Establish and justify evaluation criteria.
A2.3: Select resources with attention to their properties and sustainability.
A3.2: Identify performance standards and quality-control methods.
A4.2: Identify hazards and minimize risk.
A4.6: Demonstrate a safety mindset.
B2.2: Assess environmental and economic impacts of technology.